


WordPress Popup Plugin Integrations - Detailed Guide
WordPress Popup Plugin is a great tool to generate leads, increase your website engagement and sales, and learn more about your website visitors. By opening a popup on your WordPress website, you can collect contacts of your website visitors for further email marketing campaigns and convert leads into loyal customers.
Besides all the advanced features the plugin has, you get the opportunity to integrate popups with different applications/tools, such as MailChimp, ConvertKit, reCAPTCHA, and many others.
With the Popup Box plugin, you can use the following Integrations:
- MailChimp
- Campaign Monitor
- ActiveCampaign
- GetResponse
- ConvertKit
- Brevo (Sendinblue)
- MailerLite
- reCAPTCHA
The Integrations will work for the following popup types: Contact Form, Subscription, and Subscribe And Get A File.
MailChimp
MailChimp is an advanced email marketing tool with the help of which you can build an email list and send email
messages to all the contacts of the MailChimp list.
With the WordPress Popup Plugin, you can collect data from your website visitors and send this data to the
MailChimp list.
To make use of the MailChimp Integration, first, you need to have a MailChimp account.
Head to the MailChimp website and sign up there. If you already have a MailChimp account, you can just log in there.
After signing/logging in to your account, you need to create an API Key, which you must fill in the MailChimp Settings of the plugin later.
In your MailChimp account, go to the Extras > API Keys page. Then, click on the Create a Key button (if you don't have an active API Key) and write the name of the API Key. Copy the generated API Key.
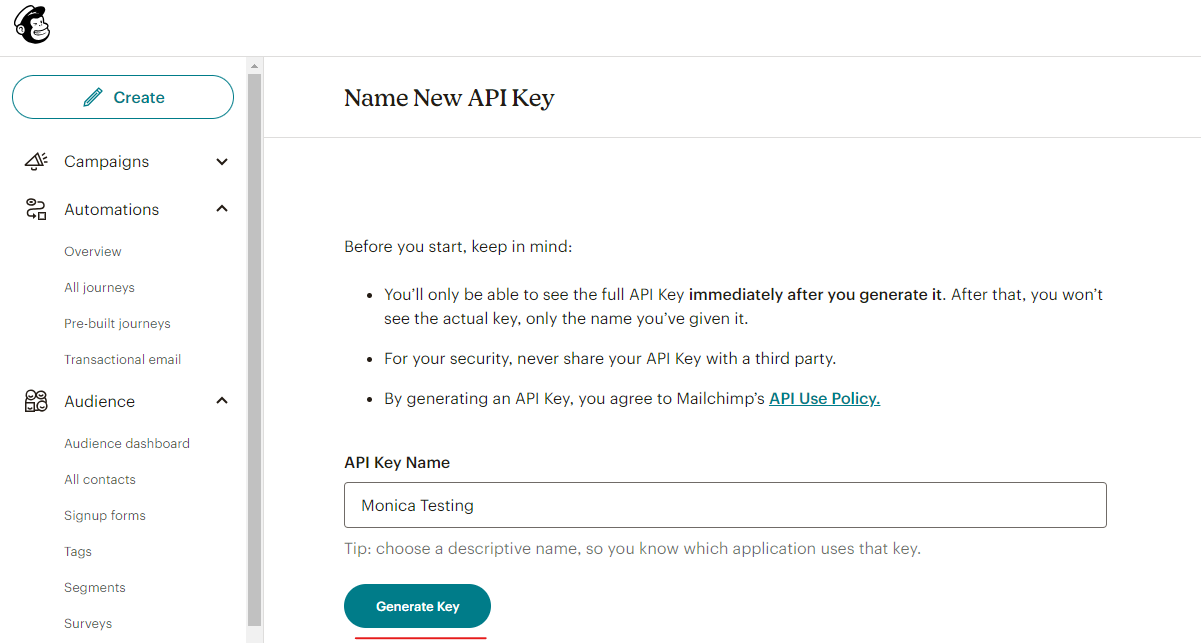
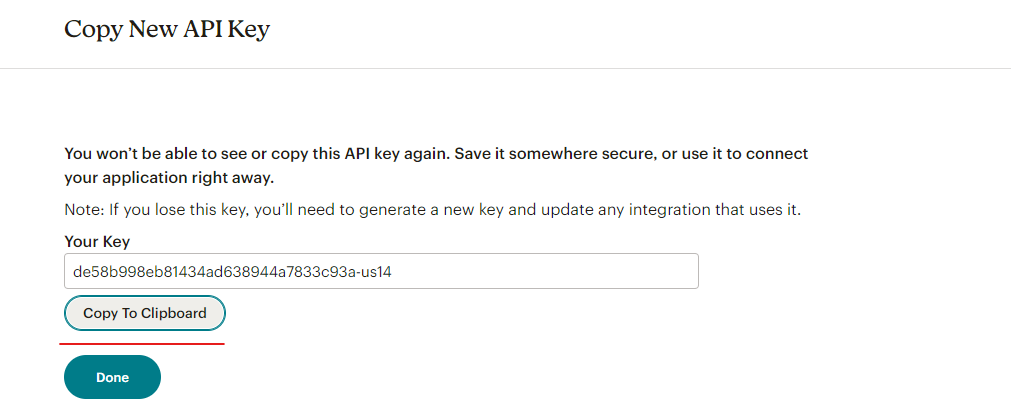
After getting the API Key, it is high time to connect the MailChimp account to the Popup Box plugin. For that, please go to the Popup Box plugin > General Settings page > Integrations tab > MailChimp Settings. Write the MailChimp Username and the MailChimp API Key accordingly and save the changes.

After saving the changes on the General Settings page, please head to the Popups > particular popup > Integrations tab. Here, you need to enable the MailChimp Integration and choose the list.
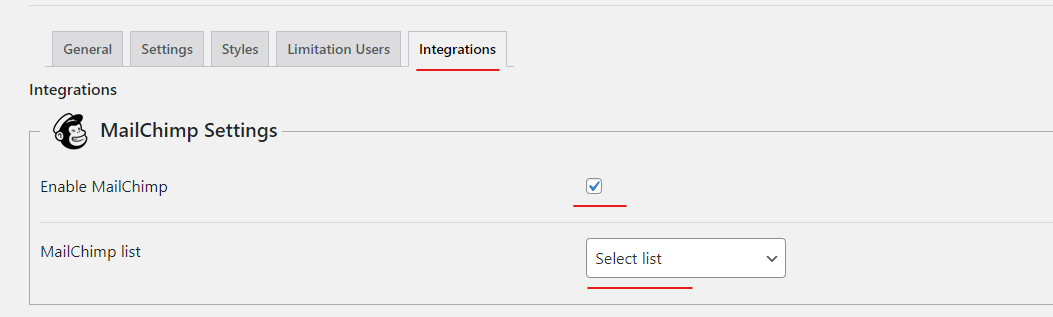
That's all! You have successfully connected your MailChimp account to the popup.
In order the Integration can work correctly for you, you need to collect the names and email addresses of your users. To collect the data of the users, please head to the Popups > particular popup > General tab > User data option. Tick the Enable button checkbox for the Name and Email fields. You are free to enable your desired custom fields for the popup. The fact whether the fields must be required or optional depends on your preferences and the use case of the popup.

Campaign Monitor
Campaign Monitor is another great email marketing tool you can use for email marketing campaigns. The tool has a user-friendly design that will help you create engaging campaigns and manage subscriber lists. Due to its simplicity, the process of creating email marketing campaigns will be an enjoyable experience for you.
To make the Integration possible, firstly, go to your Campaign Monitor account (if you don't have one, sign up there).
Once you log in to your account, go to the Account Settings page > API Keys page and generate a new API Key. Then, copy the API Key and the Client ID to paste them into the Popup Box plugin.
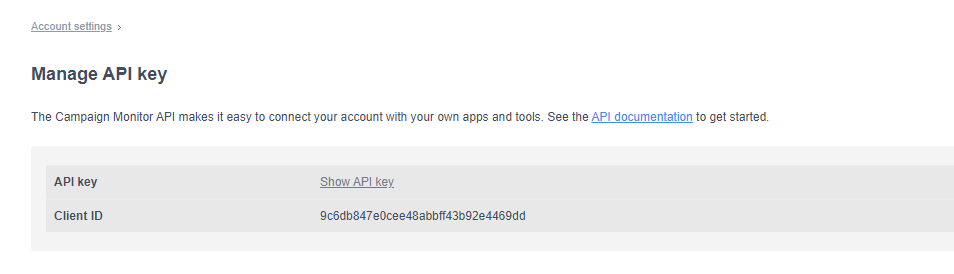
With the next step, go to the Popup Box plugin > General Settings page > Integrations tab. Paste the API Key and the Client ID you have copied. Then, save the changes.

After saving the changes on the General Settings page, go to the Popups page > particular popup > Campaign Monitor Settings, enable the Integration, and choose the list.
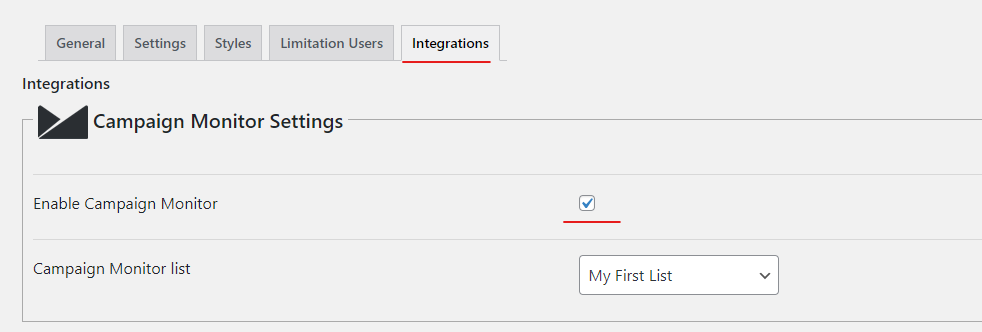
These are the steps to connect the Campaign Monitor account to the popup.
Please note, that you need to collect the names and email addresses of the users to make this Integration work correctly. To enable the functionality of collecting the data from users, you can go to the Popups > particular popup > General tab > User data option. Then, enable the Name, Email, and your desired custom fields for the popup.
ActiveCampaign
Active Campaign is another well-known email marketing tool, that provides a wide range of features. With the help of Active Campaign, you can automate the email-sending process, thus making the process of creating an email marketing campaign a fun activity.
To enable the Active Campaign Integration, firstly, either create a new account on Active Campaign or log in to an already existing account.
After logging in to your account, you need to copy the API Access URL and the API Access Key from the Active Campaign account. Then, paste it into the Popup Box Integration corresponding fields.
To get this data, head to your Active Campaign account > My Settings page > Developer tab.

Then, go to the Popup Box plugin > General Settings page > Integrations tab and paste the copied data into the necessary fields. Don't forget to save the changes.
After saving the applied data, head to the Popups > particular popup > Integrations tab. There, enable the Active Campaign Integration, and choose your desired lists.

To finalize the Integration Settings, you need to go to the Popups > particular popup > General tab > User data option. Here, you need to enable the Name, Email, and your desired fields for the popup. By this, you can collect the names and email addresses of your website visitors.
Hooray! You have successfully connected the Active Campaign Integration with the Popup Box plugin.
GetResponse
The next email marketing tool we'll discuss is the GetResponse. GetResponse offers a variety of valuable features, such as creating and sending email marketing campaigns, automation, and follow-ups, CRM Integrations, etc.
To connect GetResponse to the Popup Box plugin, firstly, you need to either create a GetResponse account or log in to the already-created one.
You need to get the GetResponse API Key from your GetResponse account. For that, head to your account > API Keys page > Generate API Key. Copy the generated API Key to paste it into the Popup Integrations Settings.
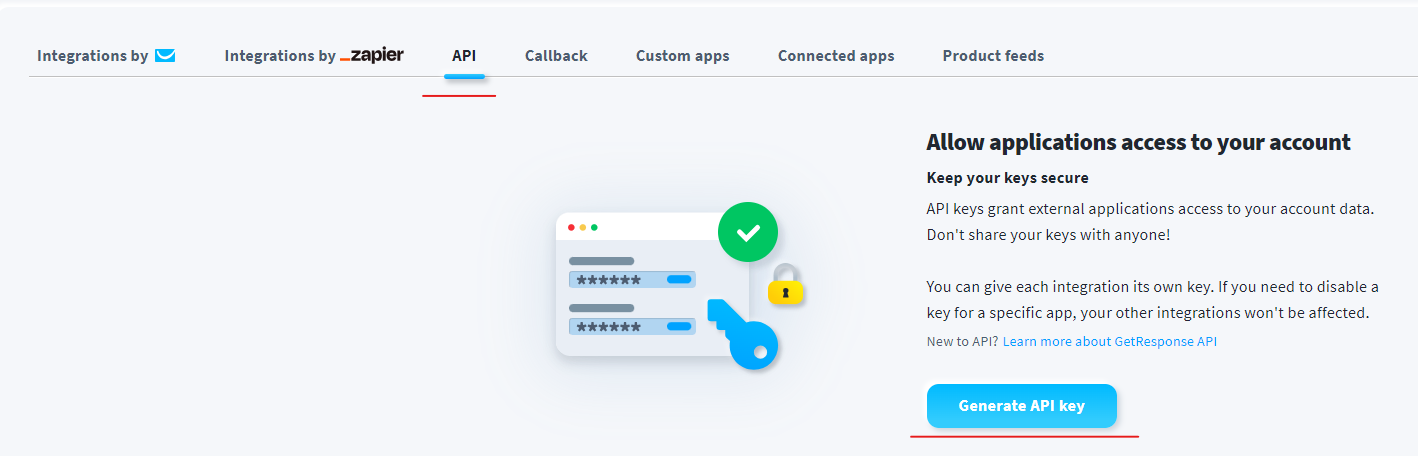

Then, go to the Popup Box plugin > General Settings page > Integrations tab and paste the copied API Key. Save the changes afterward.

After saving the applied settings, go to the Popups > particular popup > Integrations tab > GetResponse settings. There, you need to enable the Integration and tick your desired list.

Besides these settings, you also need to collect the names and email addresses of the users. For that, please go to the Popups > particular popup > General tab > User data option. Then, tick the Name and Email fields (required) and your desired fields accordingly.
ConvertKit
ConvertKit is one of the most popular email marketing tools used by companies and businesses. It has different advanced features like creating email campaigns, managing subscribers, sending targeted messages to subscribers, and many more.
To make the Integration possible, firstly, create a new ConvertKit account or log in to the existing one.
Once you log in to your account, you need to copy the API Key to paste it into the Popup Box ConvertKit Integration later. To get the API Key, head to your account > Settings > Advanced > API Keys. Copy the generated API Key.

Go to the Popup Box plugin > General Settings page > Integrations tab > ConvertKit settings. Then, paste the API Key and save the changes.

After that, go to the Popups > particular popup > Integrations tab. Enable the Integration and select the needed list.
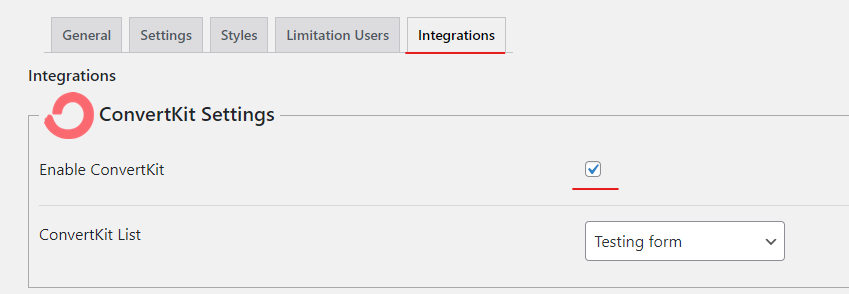
With the last step, head to the Popups > particular popup > General tab > User data option. Here, you need to enable the Name and Email fields (required) and the preferred custom fields to collect the names and email addresses of the users.
That's all. You have successfully connected the ConvertKit Integration to the popup.
Brevo (Sendinblue)
The Brevo, previously known as Sendinblue, is another popular email marketing tool. By using Brevo, you can create and send email marketing campaigns, automate workflows, target the audience, send personalized emails, etc.
To manage the Brevo Integration with Popup Box plugin, firstly, either create a new Brevo account or log in to the created one.
After you log in to your account, head to the API Keys page and generate a new API Key. Then, copy the generated API Key to paste it into the Popup Box Integration later.
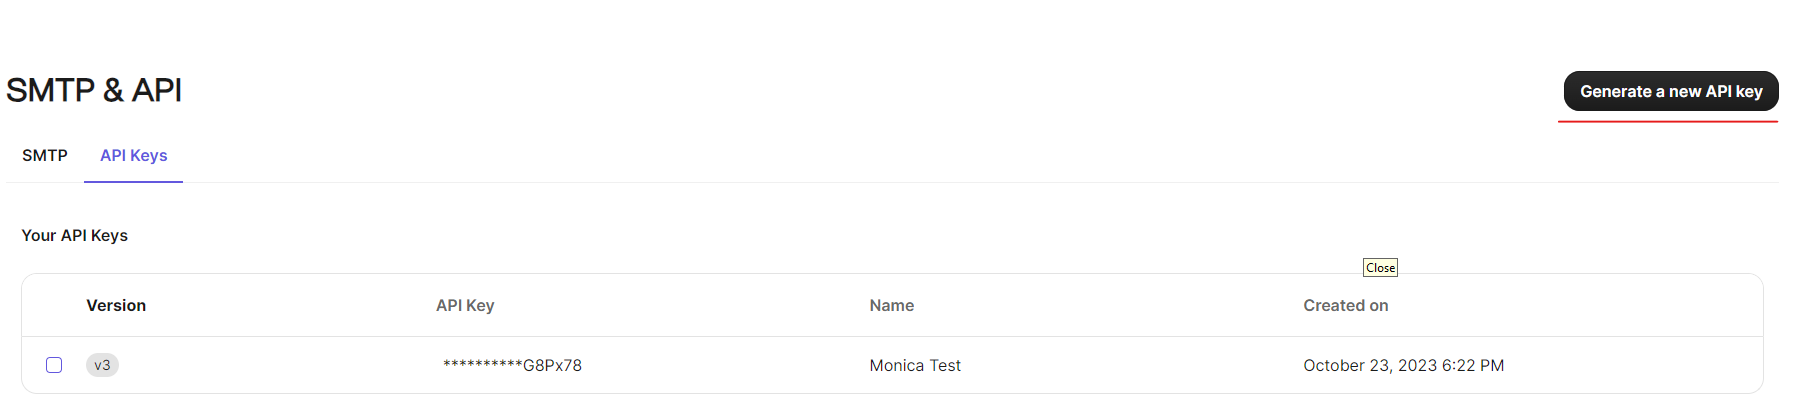
Head to Popup Box plugin > General Settings page > Integrations tab. Paste the copied API key for the Integration.

Finally, head to the Popups > particular popup > Integrations tab. Enable the Integration and choose the corresponding list.
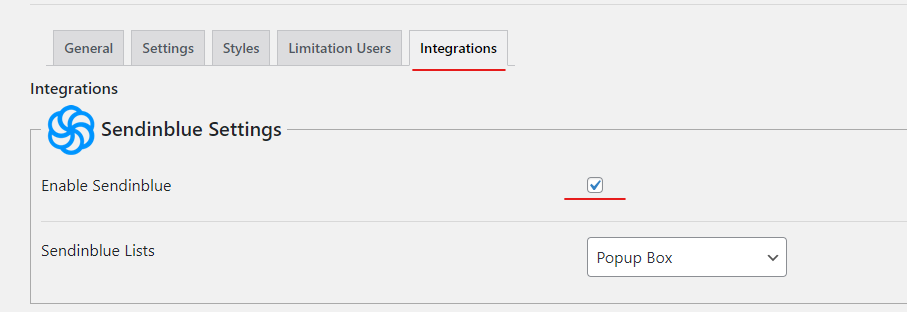
In the final step of making the Integration, you need to collect the names and email addresses of the users. For that, please go to the Popups > particular popup > General tab > User data option. Tick the Name and Email fields. You can make the fields required. Please note, that you can add your desired custom fields as well.
So, you have successfully connected your Brevo account to the Popup Box plugin.
MailerLite
The next advanced email marketing tool we'll discuss is the MailerLite. Mailerlite is an email marketing platform that helps to create advanced email marketing campaigns, send them automatically, manage subscribers, target the audience by personalization, etc.
Firstly, you need to create an account on Mailerlite or log in to the existing account. Once you log in to your Mailerlite account, get the API Key by going to the Integrations page > Developer API > Generate new token.
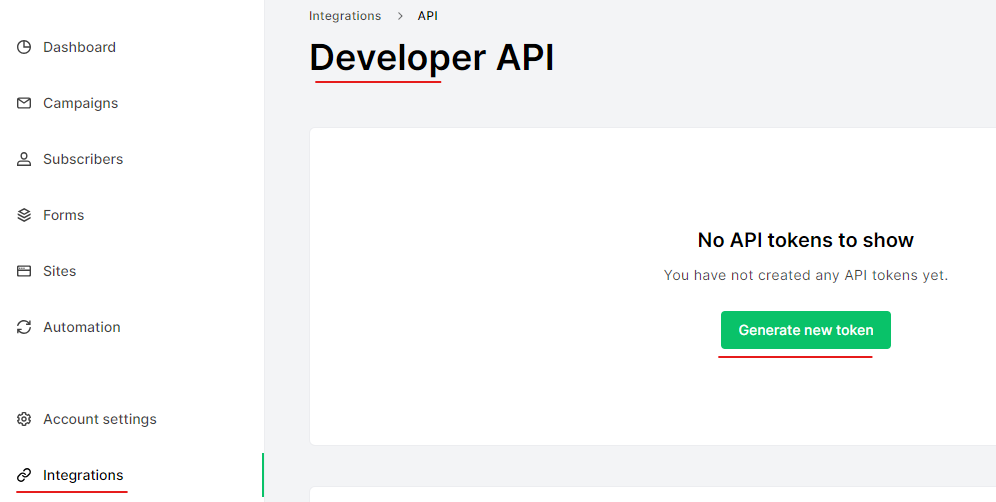
After this, copy the generated API Key and head to the Popup Box plugin > General Settings page > Integrations tab. Paste the generated API Key into the corresponding field. Then, save the changes.

After that, go to the Popups > particular popup > Integrations tab. Tick and enable the Integration, then, choose your desired list.

With the last step, head to the Popups > particular popup > General tab > User data option. Here, you need to tick the Name and Email fields (you can make them required) to collect the names and email addresses of your website visitors. Otherwise, the Integration will not work correctly for you. Please note, that you can also choose any custom field you prefer for the popup.
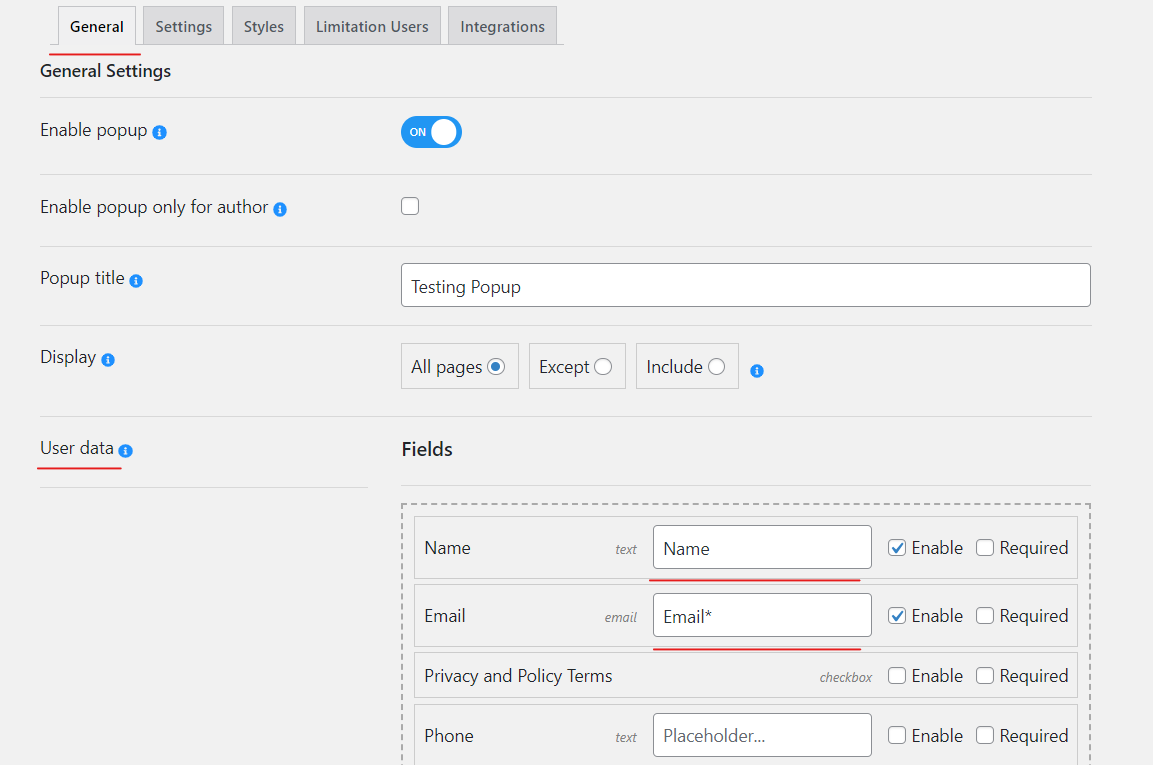
If you correctly performed these steps, then, you successfully connected the Mailerlite Integration.
reCAPTCHA
Google reCAPTCHA is a service aiming to prevent spam. It helps you ensure the security of your website visitors, thus providing them with a better user experience.
To activate the reCAPTCHA Integration, head to
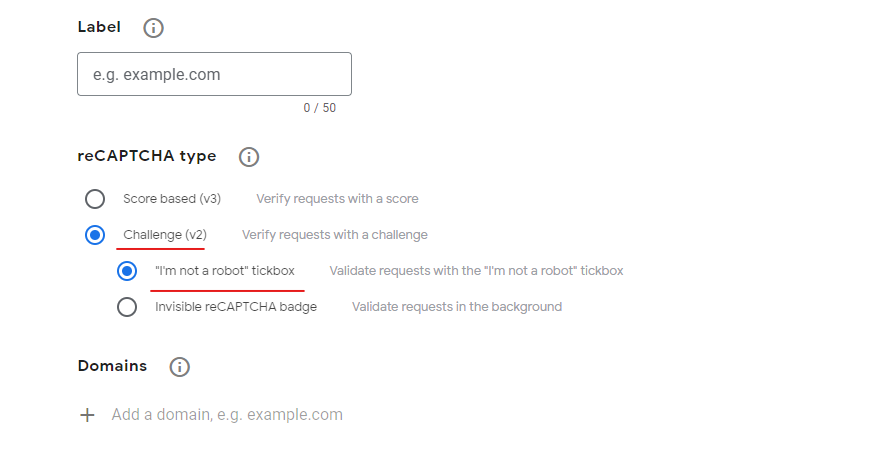
Google's reCAPTCHA admin console. Here, choose
the Challenge (v2) > ”I'm not a robot” tickbox. Click on the
Submit button.
Now, you have the Site Key and the Secret Key created.
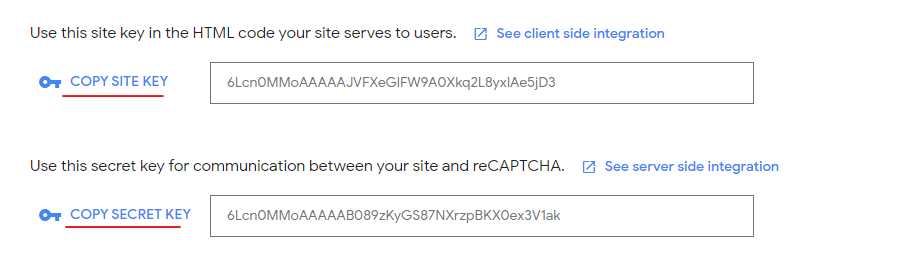
Copy them and go to the Popup Box plugin > General Settings page > Integrations tab. Paste the copied data into the corresponding fields. Then, choose your desired language code.

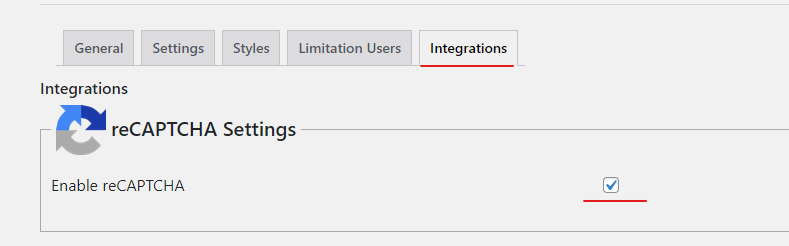
With the last step, head to the Popups > particular popup > Integrations tab and enable the Integration.
In this article, we explored all the Popup Box plugin Integrations. Don't hesitate to contact the Ays Pro Support Team in case you have any further questions.