

How to Create a Contact Form in WordPress
Have you ever visited a website that offered you a form to contact the business/company operators? That feature is called a contact form. It is an easy, fast, and useful way to collect information from your website visitors. Many websites use contact forms to improve their customer service and enhance the overall user experience. You may think that making the form is a complex process that requires strong nerves and coding skills. You do not have to worry about that! Creating a contact form with the Easy Form WordPress plugin is simple and beginner-friendly. If you want to learn how to create a contact form in WordPress without any coding skills, continue reading the article.
What Purpose Does a Contact Form Serve?
Before starting our step-by-step guide, let’s understand why contact forms are so useful and highly recommended.
Most websites provide users with a way to contact the business or website owner. It can include:
- Phone Number
- Address
- Social Media
- Contact Forms
As you can see, users have several ways to contact a website owner or business. Depending on the problem, they might prefer calling the company or visiting its physical location. However, some businesses are online, or the user may simply prefer writing a message instead of making a phone call. Or maybe the phone call is unavailable at that moment, and the user does not want to use their social media account for texting. In cases like this, contact forms are handy. Users can interact with the company by simply adding their name, e-mail address, and the message they want to send.
This option is also beneficial for the website owners, support team, or business operators. Not only does it allow them to receive the information sent by the user quickly, but also it gives them the necessary information to solve the user’s problem (or answer the question) and get in touch with the user. Moreover, users' contact information may also be helpful for future marketing purposes, as long as it is collected with proper consent.

How to Install and Activate the Easy Form WordPress Plugin
Now that we have a basic idea of a contact form and its purpose, let's learn how to install a plugin and activate the WordPress Form Plugin. Follow the four simple steps below to install and activate the Easy Form plugin.
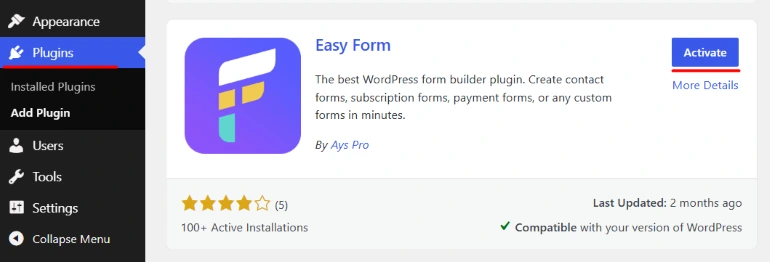
- Go to WordPress Dashboard
- Find the “Plugins” section in the left-hand menu.
- Click on “Add New” and search for the plugin name: Easy Form.
- Click Install Now, then click Activate.
That’s it! You have successfully activated your WordPress Form plugin. Now, let's dive into exposing how to use the plugin and create contact forms.
How to Create a Contact Form in WordPress Step By Step
After activating Easy Form in your WordPress site, the plugin will appear in the left-hand menu. Click on the plugin, and let's get started!
Step 1: “Add New”
When you click the plugin, you will see the Add New button. To start creating your own form, click on that button.

Step 2: Name Your Form and Page
Now that you have successfully started creating your form, you will see the initial form layout. Start by adding a form title, a page title, and a page description if needed.

Step 3: Start creating your form questions
Under the page description, you can see the form builder area where you can create your questions. You can start making questions by entering a field label and choosing a field type.

The Easy Form WordPress plugin offers users various field type options, including:
- Short Text
- Paragraph
- Radio
- Checkbox
- Name
- Dropdown
- Number
- Date
- Time
- Yes or No
- Hidden
- Linear Scale
- Star Rating
- Slider
- File Upload
- Matrix Scale
- Star List
- Slider List
- Paypal
When creating a contact form, you can use fields such as Name, Email, Phone Number, and Short Text. After choosing and labeling the field, you can add a new field or new section by clicking the buttons below the field or next to it. Moreover, you can quickly delete or duplicate the field, add an image, edit the question, and save the changes.
Step 4: Customize Your Field
Now that you know how to create contact form fields, it is time to learn to customize it. On the left side of the form builder, the plugin provides several options for customizing each field.
In the General section, you can:
- Add a Placeholder
- Add a Default Value
- Enable Description
- Enable User Explanation
- Enable Admin Notes
- Enable Limitation
- Make the Field Required

In the Style section, you can add a custom class, and in the Advanced section, you can hide the label.
However, these are not the only customization options the Easy Form plugin offers. You can customize your contact form by exploring the sections below.:

Step 5: Save
After finalizing your contact form, do not forget to click the "Save" button to save your changes.

Step 6: Insert the Contact Form Into a Page
Now, we have reached the final step. To add the form to a page or post, you first need to find the shortcode of the form you created and copy it. But no worries! The process is as easy as you can imagine. After you click "save" the form, the shortcode appears above your page. All you need to do is click on it and copy the code.

Now that you have copied the shortcode, go to the "Posts" section (left submenu of the webpage) and click on "Add New Post." Enter the title of your post, paste the code, and click on "Publish." You can also save the post as a draft, preview it, or delete it.

Well done! Your contact form is now ready, thanks to the Easy Form WordPress plugin.
Tips for Creating an Effective Contact Form
Since we have already learned how to create a contact form in WordPress, it will be useful to understand how to use this knowledge as effectively as possible. As mentioned earlier, contact forms play an important role in customer service and information gathering. In order to create a well-designed contact form to improve user experience and increase conversion rates, you should follow some tips!

Make it as Simple as Possible
Do not overwhelm users with unnecessary or confusing fields. Think from your user’s perspective: would you fill out a time-consuming form with unnecessary fields just to get in touch with the company? At that point, the customer may choose not to contact you at all. Therefore, be precise and create a time-efficient form. I recommend including fields such as:
- Name
- E-mail address
- Short text
There may also be cases where you need a dropdown, checkbox, radio button, date field, and so on. The point is to avoid including unrelated fields.
Make it Visually Appealing
Another important aspect of your contact form is its visual design. Website often pay attention to visual design. If your contact form does not match your website's colors or if the design is too dull or too overwhelming, they will most likely not use it. Easy Form offers several customization options to help you solve this problem. You can change colors, sizes, designs, and so much more. Make your contact form more appealing to your website visitors.
Make the Form Less Intimidating
As I mentioned earlier in the article, you have the option to make a field required. However, do not use it for every field! It might make the user feel like they are obliged to fill in everything and might end up not using the contact form. If there are fields that are still relevant but less important than others, leave them optional. In this way, the website visitor will feel like they are in control of what information they should give you. This can help improve the user experience and increase form submissions.
Make Sure to Keep Track of Monitoring and Responding
Finally, let’s remember what the point of a contact form is. Websites use it to make communication between website operators and users quick and easy. That is why it is crucial to monitor submissions and respond to them regularly. With our plugin, all you need to do is click on "Easy Form" on the left submenu and click on "Submissions." Review your users’ messages and respond as quickly as possible.

Test Your Contact Form Before Publishing
Before making your contact form live, always test it from a visitor’s perspective. This small step helps you avoid missed customer messages, broken fields, or unclear instructions.
Make sure to check:
- Whether all required fields work correctly
- If the form submission reaches the right email address
- Whether the success or error message is clear
- How the form looks on mobile devices
- If the form is easy to complete without confusion
A quick test can improve reliability and make sure your visitors have a smooth experience when contacting you.
Conclusion
To sum up, contact forms provide a convenient and necessary way for website owners and users to communicate. Creating a contact form can help increase user engagement on your website. This is where Easy Form comes in! Our WordPress plugin is user-friendly, easy to use, time-saving, and convenient. You can activate the plugin and create your contact form in just six steps. Remember to explore the plugin’s features and use the tips in this article to create a contact form that delivers better results.


